Unlike Mac, almost every laptop running Windows has a print button, however, some users face problems taking screenshots with Windows 7. It is because the print screen button occasionally fails to function.
If this is the case with you, you should not worry. This post will explain how to capture a screenshot in Windows 7 and how to resolve any screenshot issue you may run into.
When are screenshots useful?
Screenshots are useful for everyone! Once a screenshot is taken, it can be forwarded to a person or saved for later use, both of which are useful options.
Here are a few of the numerous uses for screenshots.
Not everyone has the updated Windows and some still use Windows 7 laptops or computers, but taking and saving the screenshots is still handy for every user, no matter what Windows they are using.
- People often want to take screenshots in various situations. For instance, if you are a student who is enrolled in an online course, screenshots could be a terrific approach to support your note-taking during online lectures or presentations.
By doing this, you can avoid missing out on important information during a live lecture by taking a snapshot of the information being presented and saving it for later use. - Screenshots are also quite useful in an office environment, they enable you to record or distribute information to your coworkers for IT help, such as error messages or software problems.
- Additionally, it helps you remember things. Wouldn’t it be good if we could recall everything we hear or see effortlessly? Sadly, the majority of us can not. In this situation, you want to record information to keep in mind and use for future reference.
This could be anything from a website link to an address that you wish to check out or pass along to a colleague!
Common Screenshot issues
It is possible to take screenshots on Windows 7, but there are some typical reasons why some users face problems. Let’s discuss why some users find it hard to take screenshots:
- Incorrect key combination: In Windows 7, you must hit the ‘print screen’ or ‘PrtScn’ keys to take a screenshot, however, some laptops have unique key combinations that are different from their brand or model which you should search online for the correct key combination.
- Not using an image editing program: To save a screenshot as an image file, it must first be put into an image editing program like Paint or Photoshop. Someone who is unaware of this step might believe the screenshot is broken.
- Screenshot not saved: Screenshots are not immediately saved as picture files when they are taken in Windows 7. Instead, they are copied to the clipboard by default. Users must save the snapshot after passing it into an image editing program.
- Hardware or software problems: Users may be unable to take screenshots if the PrtScn or print screen is not working properly. In these situations, it is necessary to update or troubleshoot the keyboard.
Methods for taking a screenshot on Windows 7:
There are not as many ways to take screenshots as there are on Windows 11, but you still get plenty of options.
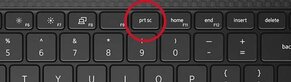
The quickest way to take a screenshot is by using the print screen key on your keyboard it is normally located in the upper right-hand corner of your keyboard.
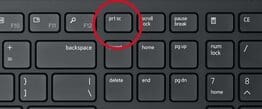
Or it can look like this on a wireless keyboard:
First method: Press “PrtSc”
Now to capture an image of anything that’s on your screen all you have to do is press the ‘PrtSc’ key one time and it will place that image into your computer memory and then you will be able to paste that image into any program that accepts images like a photo editor or a microsoft office word program.
Now there is something to make note of, if you don’t get any indication or any message that says anything has happened but it has actually placed that image into computer memory, some of people might not be aware of that.
You can now paste that captured image into a photo editing program like Paint which is built-in into Windows.
Go into the start menu, choose all programs, then go to the accessories and that will allow you to click on paint, then open up the paint photo editor and paste the captured image there.
To do this, either select Paste from the Edit drop-down option in the menu bar or press Ctrl+V. The document will contain the screenshot that was taken. You may now print, email, save, or share it in another way.
Even though the Print Screen key does not function by itself, you can still try using it in combination with other keys to see if you can capture screenshots.
Second method: Press “Windows + PrtScn”
On your keyboard, press the “Windows + PrtScn” button. In your “Pictures” library’s “Screenshots” folder, this will take a screenshot of your full screen and store it as a file.
Third method: Press “Alt + PrtScn” keys
On your keyboard, press the “Alt + PrtScn” keys. This will take a screenshot of the currently used window, which is the active window, and save it to the clipboard.
The screenshot can then be saved by pasting it into a document or picture editing tool.
Fourth method: Use the snipping tool
The snipping tool makes it simple to take a screenshot if the above method does not work. The snipping tool is available in Windows 7, 8, and 10, as well as all newer versions. By using the toolbar search, you may quickly open it.
Follow these simple steps:
First, you have to open the snipping tool by selecting it from the Start menu and then type ‘snipping tool’ into the search box. Once it appears click on it to start the tool.
From there you may select the type of snip you wish to take, such as a rectangular snip, a free-form snip, or a window snip.
Simply choose the preferred snip type, click and drag the mouse to choose the necessary location, and then let go of the mouse button. That’s it! Your screenshot will show in the Snipping Tool window, where you can save it or make any changes that are needed.
If you want to take a screenshot without using the snipping tool, fear not! Windows 7 has built-in shortcut keys.
As explained above, all you have to do is simply click the ‘Print screen’ button on the keyboard of your laptop. This will capture the whole screen. And if you only want to capture a specific window press Alt+PrntScrn. By doing this you can save a picture of the window to your computer’s memory.
Fifth method: Press “Fn + Insert”
Press Fn+Insert if your keyboard does not have a Print Screen key.
Now, open an existing document or start a new one. Do this in any program that allows you to paste photos such as Microsoft Word or Paint.
You can now paste the screenshot on any desired program by selecting Ctrl+V or simply selecting paste from the edit drop-down in the bar menu.
Double-check if you pressed the right key:
Check to make sure you selected the right key to print the screen. Look for the one that says “PrtScn,” “Prn Scr,” “Prtc,” or anything similar to that.
The print screen button may be placed on a different key such as shift, on some laptops. So if you are looking for that tricky ‘Print screen’ button, make sure to look into all the keys.
One more important thing is that you may need to press both the function(Fn) key along the print screen key to take the screenshot. Some people really get confused and press one key at a time.
I hope this guide will help you take a screenshot on Windows 7 which is not a difficult task to do, it is just a game of the keys.